This post will show you a step by step rundown of an upgrade from vRealize Automation Version 8.6.2 to Version 8.10.1. We will cover every step needed and we will also look at a few things you might want to check before and during the upgrade.
Introduction
So, you might ask: “8.6.2 ? Isn’t that quite old ?”. True indeed, it is. Since vRealize Automation On Prem release cycles have more or less been adjusted to match vRealize Automation Cloud releases it has been becoming increasingly difficult to keep up with the update schedule. Once you have the next upgrade version candidate that has passed all the tests and you are ready to go with it, there might be some weeks if not months gone by until you reach production with that version.
So everything pretty much depends on your team size and how much effort you can put in on working “on” the system rather then actually working “with” the system.
8.6.2 has proven to be very reliable for our use case. There were a few bugs and feature requests that we placed with VMware and luckily they found their way into the product. So it was time to move on…
Preparations
Upgrade path
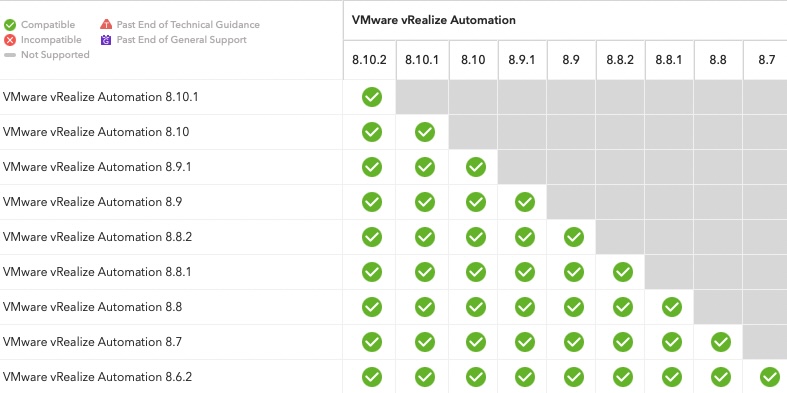
First we consult VMware’s Product Interoperability Matrix to see if a direct upgrade from 8.6.2 to 8.10.1 is even possible:
Since there is also vRealize Suite Lifecycle Manager (vRSLCM) and VMware Identity Manager (vIDM) involved we also want to check to which version we have to upgrade those so they work with vRA 8.10.1. This can be found in the Interoperability section:
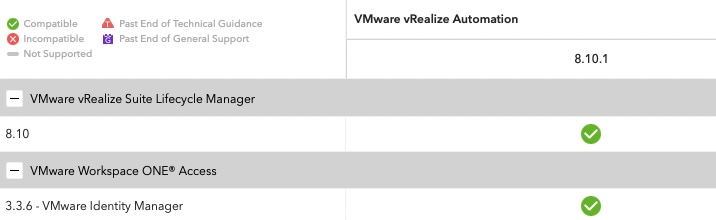
According to the matrix we do not need to upgrade vIDM as we were already on version 3.3.6 since our last vRA upgrade to 8.6.2. One component we need to upgrade is vRealize Lifecycle Manager. The required version is 8.10 and most likely we also need to install the latest product support pack, but more on that later.
Gather upgrade files
In our case we have to upgrade multiple systems that are sometimes not connected to the same vRSLCM, that’s why I usually grab all the files needed directly from VMware’s site instead of downloading them online via LCM. There are two places we have to go to get the files needed:
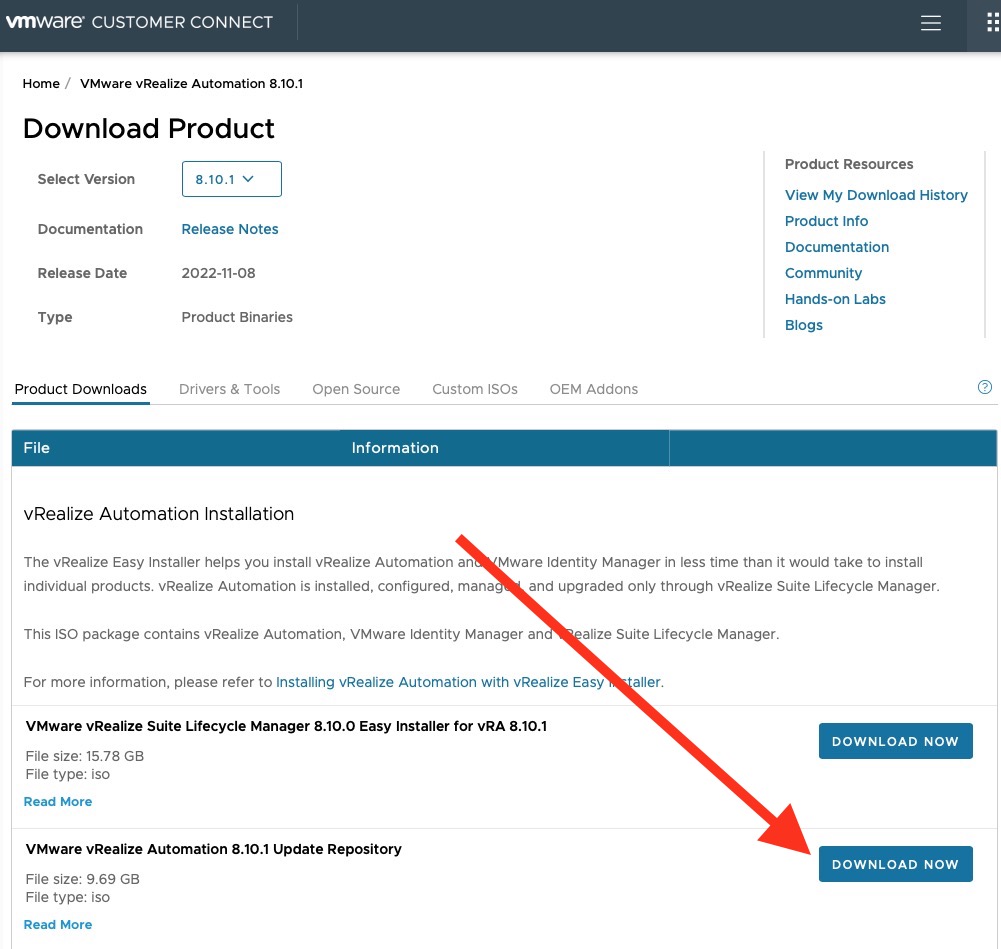
Upgrade files for vRealize Suite Lifecycle Manager and vRealize Automation
Those can be found in the donwloads section of Vmware Customer Connect:
Product support pack for vRealize Suite Lifecycle Manager
As previously mentioned we might also need a product support pack for vRSLCM to support vRA 8.10.1.
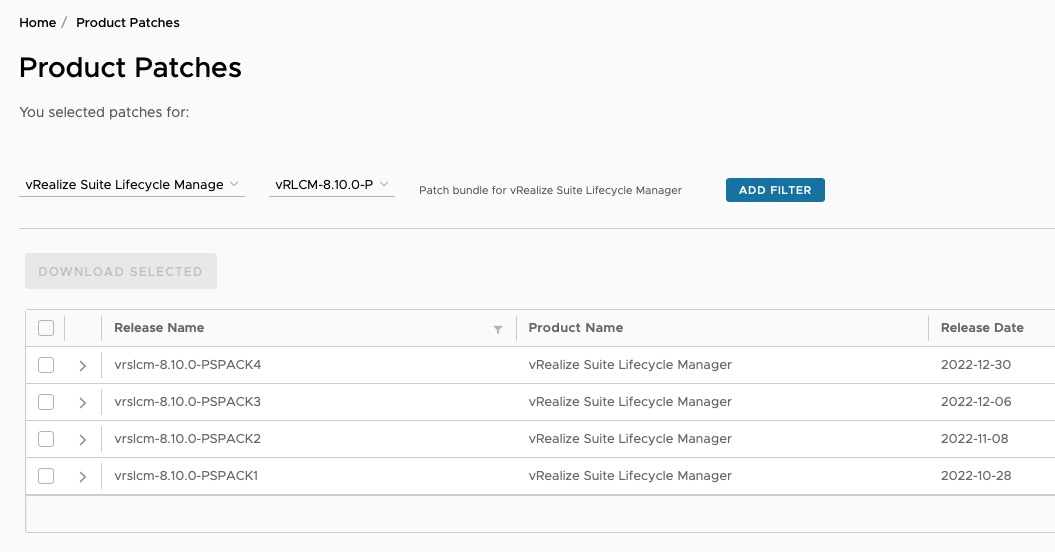
As we can see in the docs we need at least “vRealize Suite Lifecycle Manager 8.10.0 Product Support Pack 2” for vRA 8.10.1 to be supported.
This can be found here:
Select “vRealize Suite Lifecycle Manager to the left, then select the corresponding Support Pack on the dropdown to the right:
Upgrade order
The upgrade order for vRealize Automation will be the following:
- Upgrade vRealize Suite Lifecycle Manager
- Install latest patches for vRealize Suite Lifecycle Manager (if any).
- Install product support pack for vRealize Suite Lifecycle Manager to get it to read the target vRealize Automation version installer.
- Upgrade VMware Identity Manager (Not needed in this case as we are already on 3.3.6).
- Upgrade vRealize Automation.
Upgrade
vRealize Suite Lifecycle Manager
First we are going to take care of vRSLCM. As always I would suggest to take a consistent snapshot of the VM by shutting down the guest OS and creating a snapshot of your vRSLCM VM.
As we have downloaded the VMware vRealize Suite Lifecycle Manager 8.10 Update Repository Archive as an ISO we are going to upload this to a datastore that is accessible by the ESXi host the VM currently resides on. Then we are going mount it to the CD-ROM drive of the VM.
We then log in to vRSLCM and navigate to “Settings/System Upgrade”. As “Repository type” we select “CDROM” and press “Check for upgrade”:
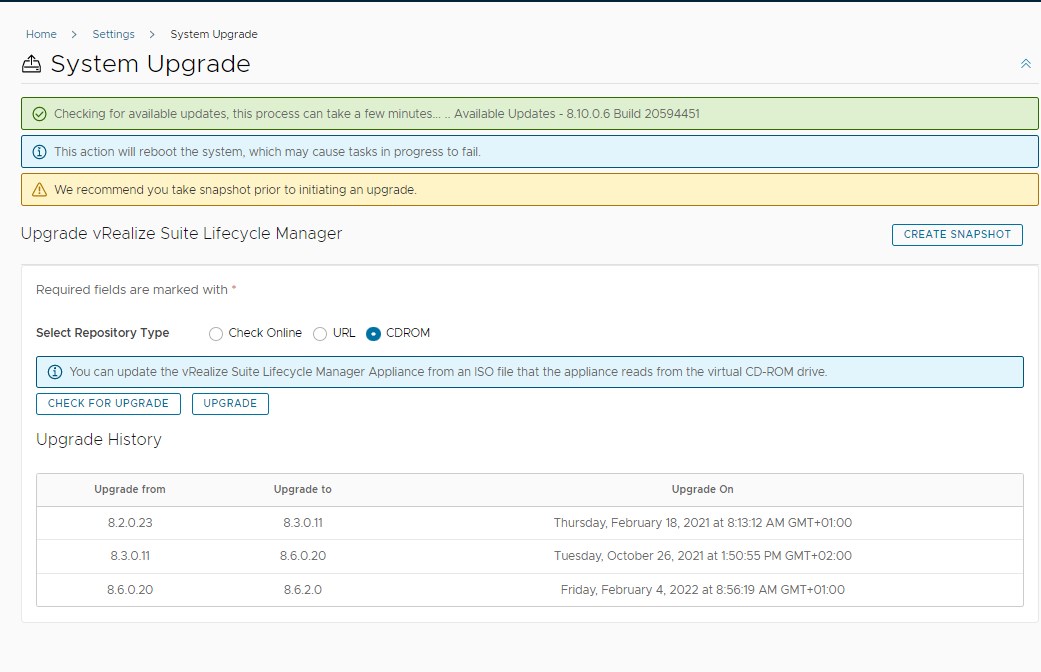
Our target vRSLCM should now show up in the green bar on the top of the screen and we will be able to trigger the upgrade by clicking “Upgrade”.
This will take us to a precheck screen. Prechecks in this case mainly consists of checking if there is enough space on the appliance to be able to execute the upgrade and if the appliance is accesible with the root password stored in vRSLCM’s locker section.
Once the prechecks were all successful we go ahead and actually trigger the update. During this process vRSLCM can reboot multiple times and it make take a few minutes until it is finished. Sit back, enjoy a good cup of coffee..
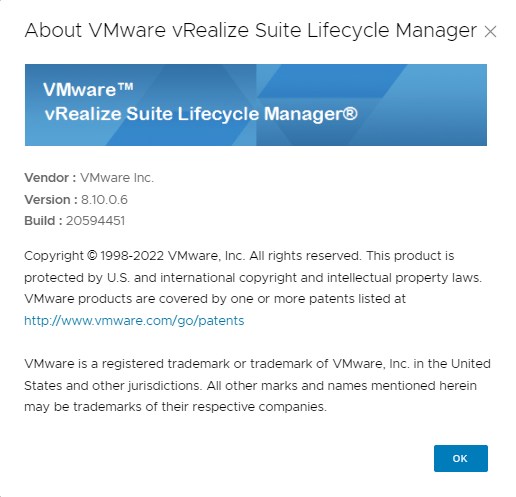
Logging back in to vRSLCM we are going to verify the current version:
Now it’s time to bring the product support pack in place since in the current state vRSLCM would not be able to recognize the vRA 8.10.1 upgrade repo. To upload the product support pack we navigate to “Settings/Product Support Pack”:
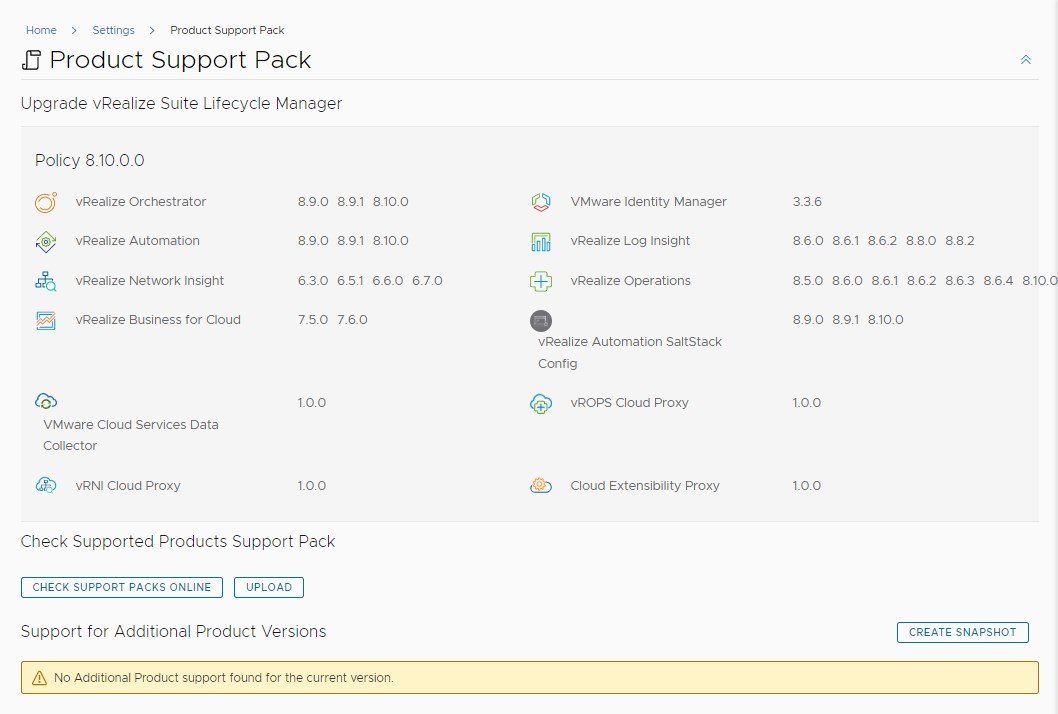
Here we have the possibility to “Upload” the product support pack we previously downloaded from VMware’s patch download page. Once the product support pack has been successfully applied you should now see that the current policy now supports vRealize Automation 8.10.1.
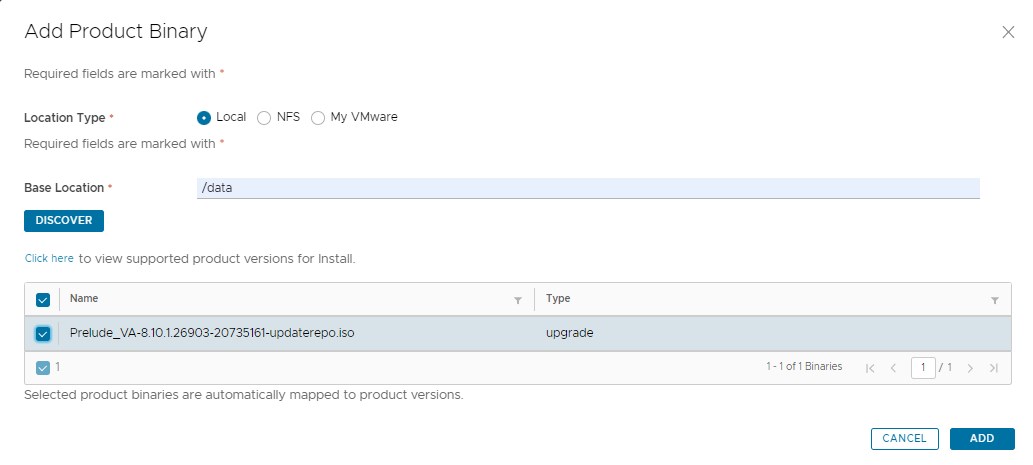
This brings us to the last step in preparation for the vRA 8.10.1: Importing the upgrade repo for vRA to vRSLCM and perform the binary mapping to have the upgrade available in vRSLCM.
As we have downloaded the VMware vRealize Automation 8.10.1 Update Repository locally we are going to transfer it to the vRSLCM appliance using SCP file transfer. I usually upload this to the directory called “/data” for vRSLCM to binary map this later. Once uploaded we can trigger the binary mapping by navigating to “Settings/Binary Mapping”:
You can check out the progress in the requests section of vRSLCM. This can take quite some time depending on your infrastructure specs. Once the mapping was successful we can finally continue to what we actually wanted to do: Upgrade vRealize Automation.
vRealize Automation
Before we start upgrading vRealize Automation I would also suggest to take a consistent snapshot of the appliance. vRSLCM is also going to take one during the upgrade process, but this will happen while the appliance is powered on. So if you can afford the time I would do complete shutdown of the appliance and issue a snapshot in a powered off state. Since vRealize Automation is a Kubernetes construct, the correct way to do this is by selecting “Power off” on your vRA environment in vRSLCM. This will tear down all the Kubernetes ressources before shutting down the guest operating system. You can also do this without using vRSLCM by logging in with root credentials to the vRA appliance and issueing
/opt/scripts/deploy.sh --shutdown
before guest OS shutdown , and
/opt/scripts/deploy.sh
after powering on the guest OS.
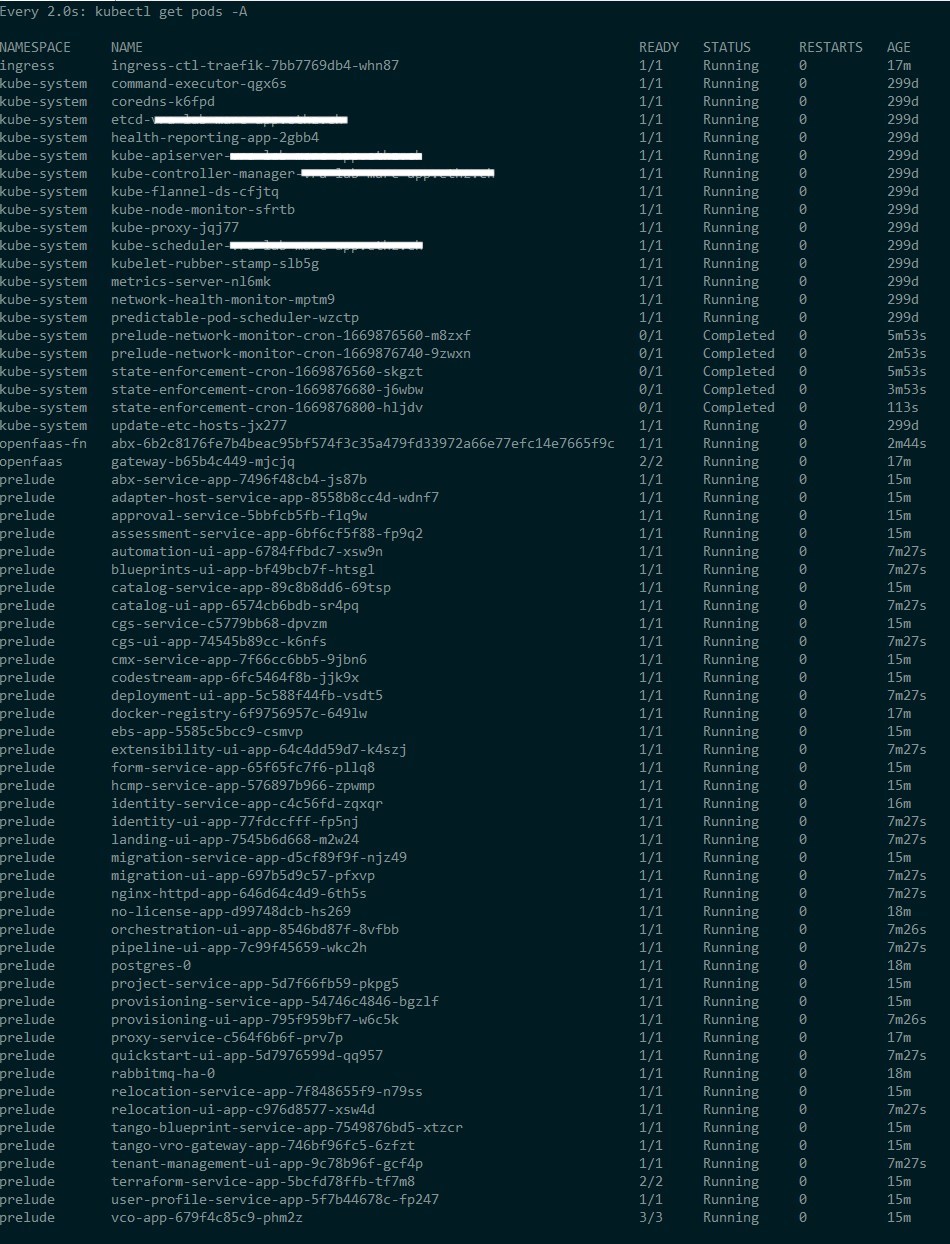
After vRA is up again we will quickly confirm that all the pods are running using
kubectl get pods --all-namespaces
We now proceed to the upgrade by going to our vRA Environment in vRSLCM and selecting “Upgrade”. This will tell us to perform a “Trigger Inventory Sync” first to make sure that vRA is actually accessible with the root credentials stored in vRSLCM locker and that the appliance VM can be accessed on its current vCenter:
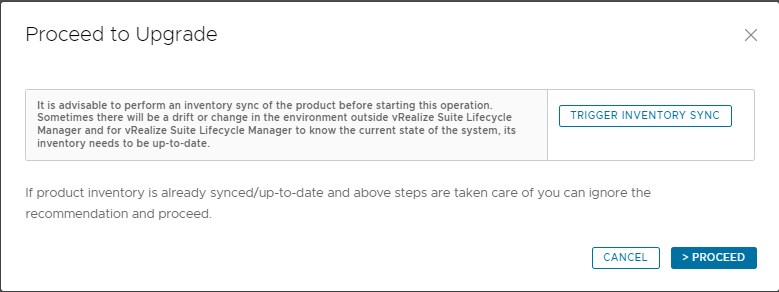
Once this is confirmed we can proceed to the actual upgrade screen:
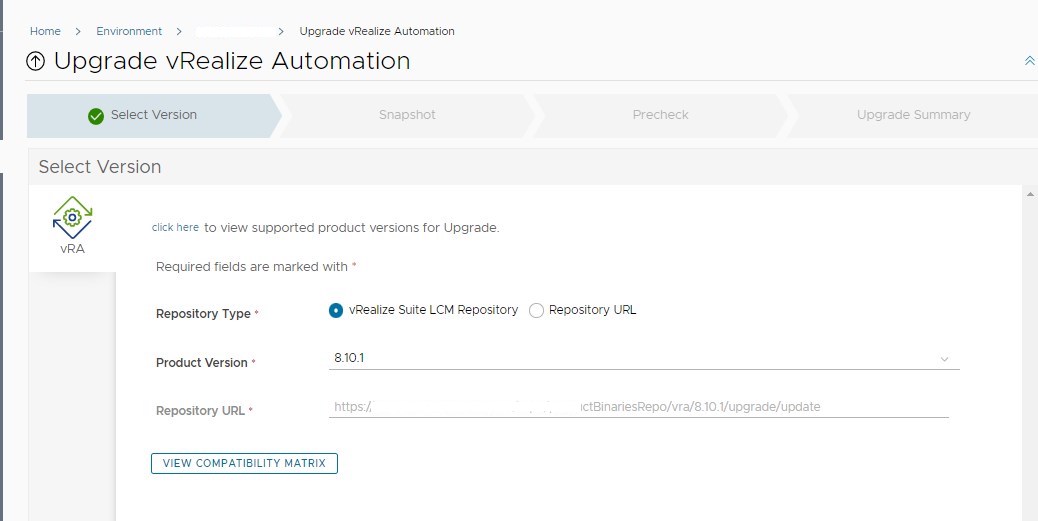
As “Product Version” we should now be able to select 8.10.1 as we previously mapped this to vRSLCM. If you have different versions available here because of previous source mappings, make sure you are selecting the correct target version.
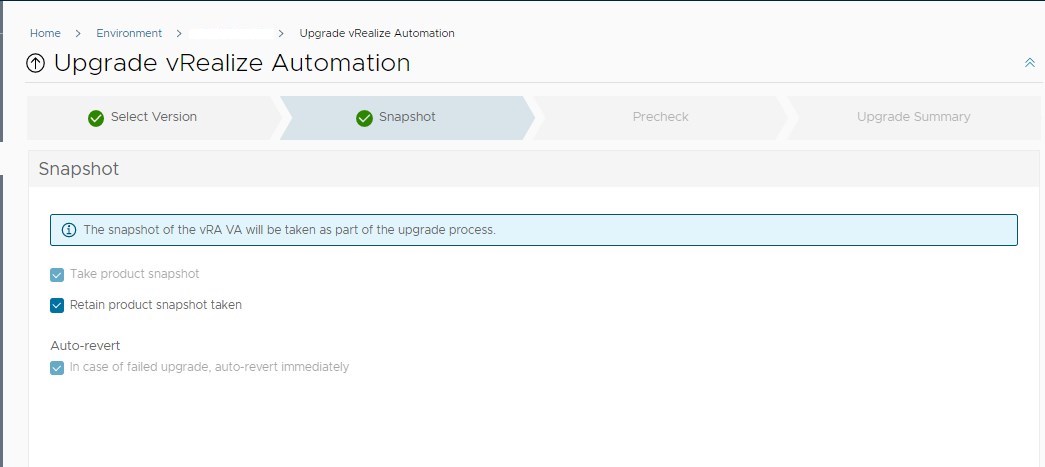
Next vRSLCM is going to make sure that there will be a snapshot in place before the upgrade. As we previously created one in a powered off state we are on the safe side here.
One thing that has to be mentioned here: I did not quite get why the auto-revert option is greyed out. In my case I actually had an upgrading failing and vRSLCM reverted to the snapshot immediatly. Since the vRSLCM snapshot has happened before the upgrade even started I was not able to inspect or grab vRA logs since they were gone also.
On to the prechecks. vRSLCM is going to perform quite a few of those, amongst them are:
- vRSLCM can login to vRA with root credentials via SSH
- Enough space to carry out upgrade
- VM specs do match with VMware prerequisites (CPU/RAM).
- Forward and reverse DNS entry for vRA hostname
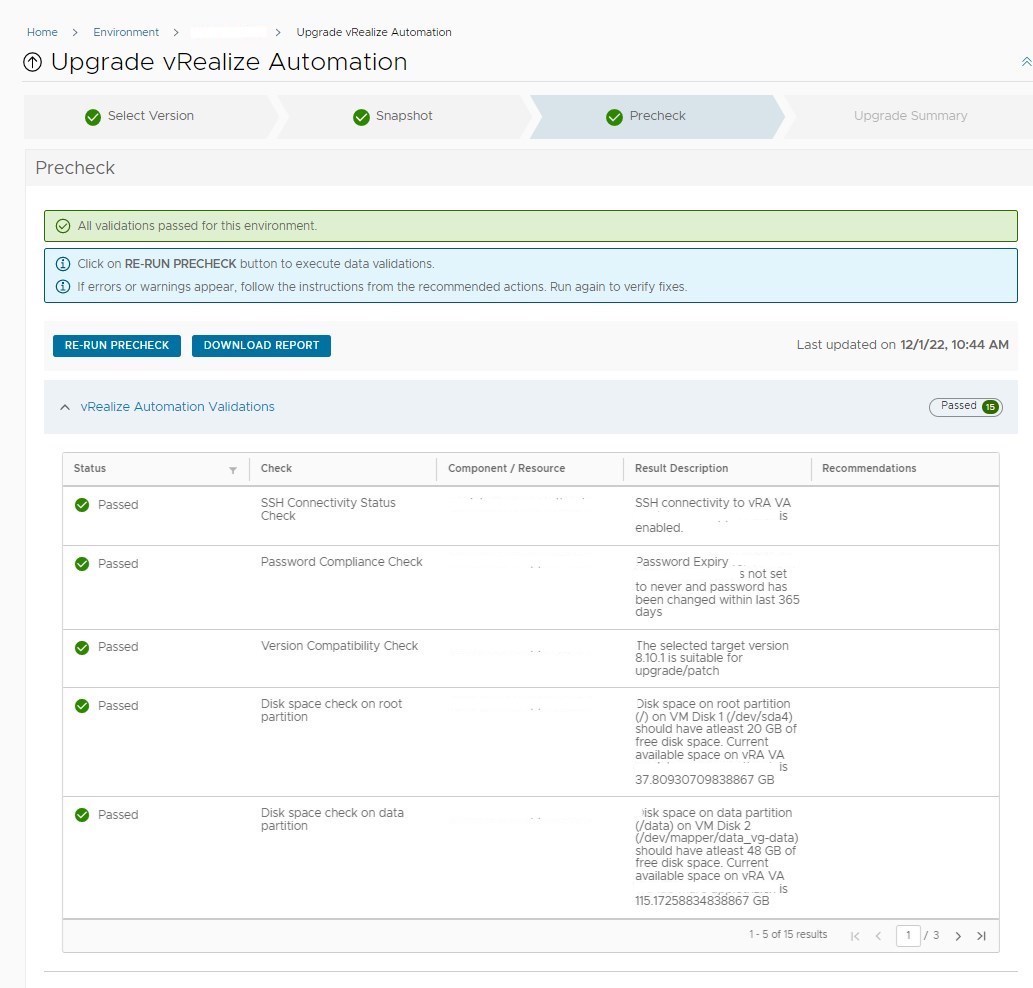
Carefully examine the precheck results as the checks might have been changed compared to the last time you did an upgrade. For example in my case I ignored the warning that I altered password expiry on my appliance (It was my lab…) which then led to the password immediatly expiring during OS upgrade. Of course vRSLCM was not able to SSH into the appliance anymore and the upgrade failed. You can get away with the appliance not meeting the current CPU/RAM prerequisites if it’s a lab environment and you tuned those values accordingly.
Once everything has passed the checks, it’s finally time to hit that upgrade button !
Observing the upgrade
Once you submitted the upgrade you will be able to watch its progress in the “Requests” section of vRSLCM:
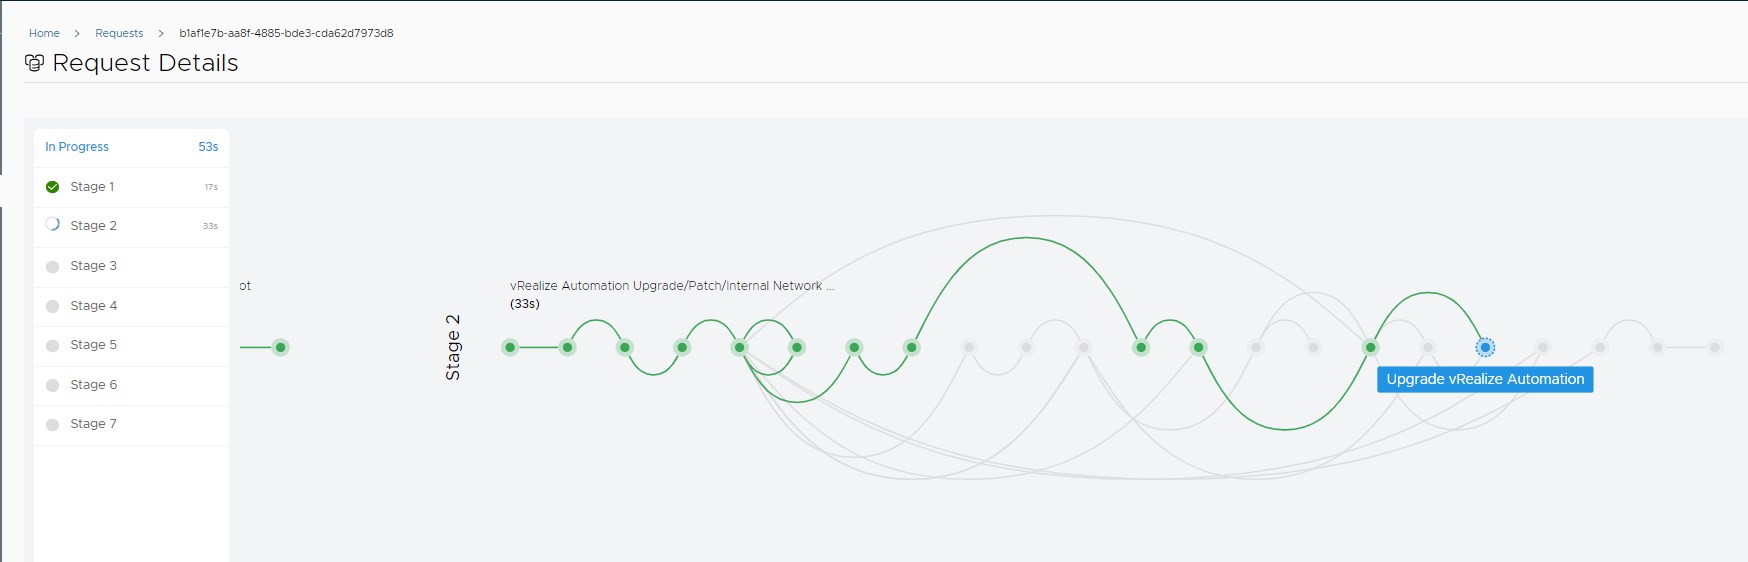
This operation can take up to an hour, depending your environment. There are a few steps to it, also depending on your target version. Usually it could consist of the following:
- Tear down existing vRA Kubernetes deployment
- Upgrade Appliance Photon OS
- Upgrade Kubernetes (Will not go into details here)
- Copy new vRA Kubernetes resource definitions to vRA Appliance
- Bring up vRA Kubernetes deployment
To observe the update you can SSH into the applliance and watch the old pods being destroyed and coming up again by executing
watch kubectl get pods -A
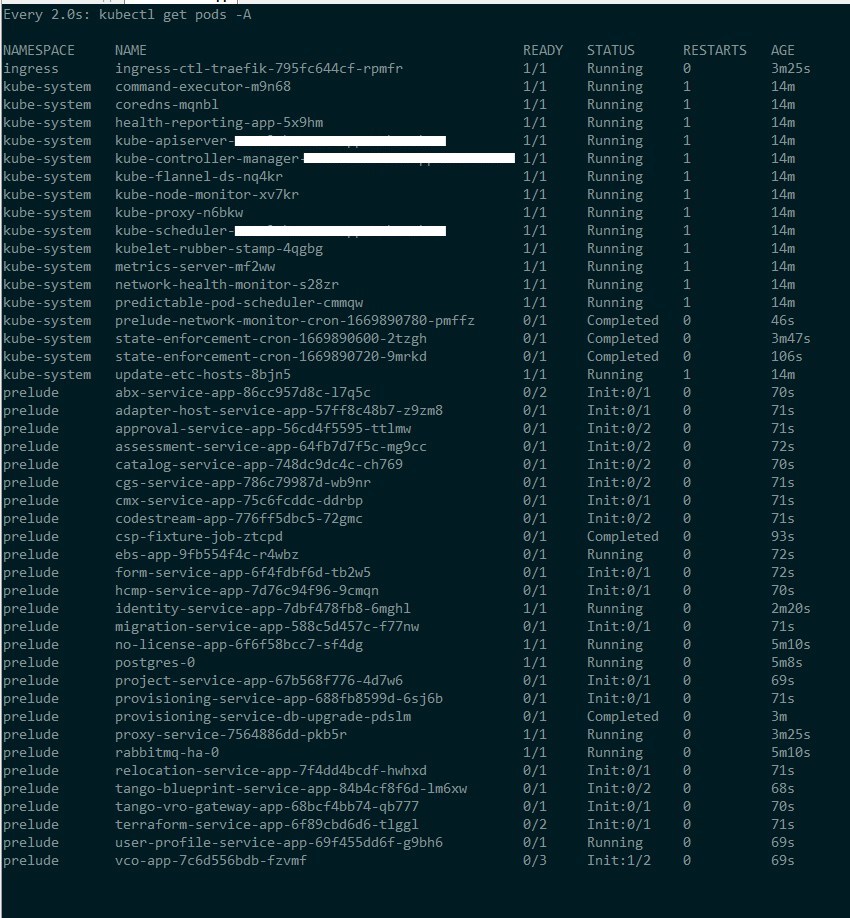
Once everything is back up again it should look like the previous picture of the pod status before the upgrade.
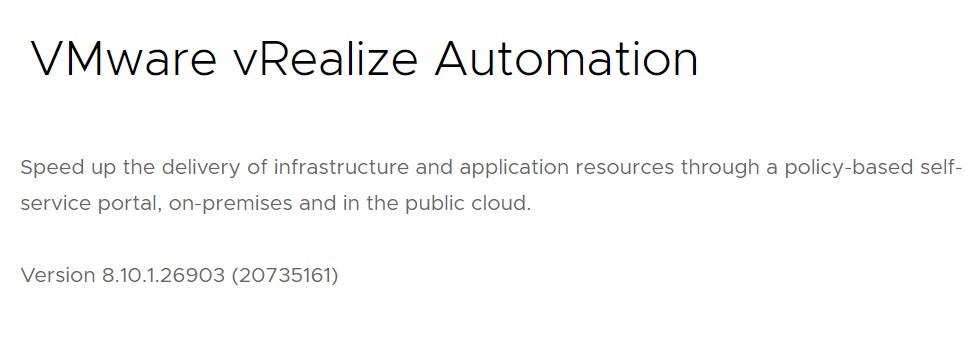
We can now confirm the version by going to the vRA URL:
Changes
This section deals with a few topics that were of interest specificly in our environment. It might be completely different for your use case. As mentioned in the introduction we usually evaluate and test each version before we consider it a target version to upgrade to. Like this we are able to adjust to new features (or bugs even) before we go to production.
Here a few that were noteworthy in our use case:
Content Sharing Policies
In vRA 8.6.2 the method of sharing content from a content source was not very flexible and not very user friendly from a UI perspective. After jumping to 8.10.1 this has changed now to a policy based system. This provides a more granular way of controlling who has access to which content. During the upgrade all previous entitlements to content will convert to per project content sharing policies:
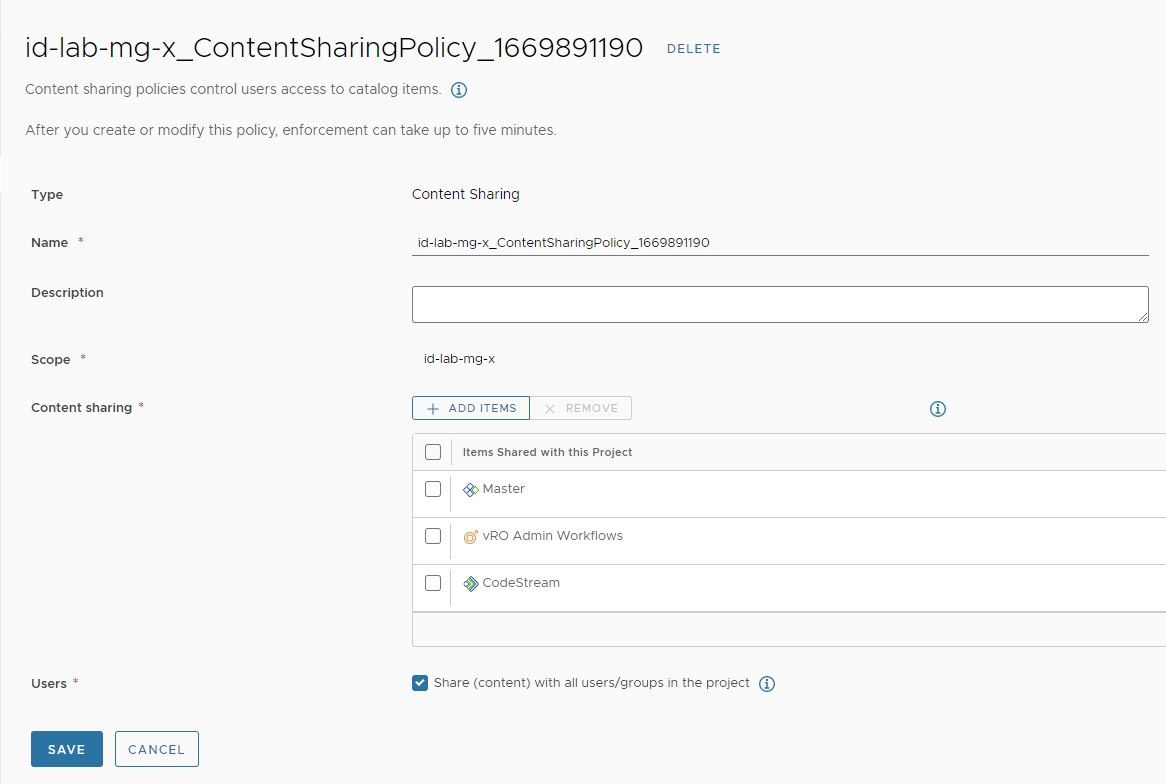
To ensure uniqueness the policies do have a random suffix, which leaves you with some work if you intend to use a specific naming schema there. As we create projects in code this is also something that has to be adjusted. Unless something slipped my eye there is currently no documented call in the swagger doc that deals with creating these policies. One would still need to use the entitlement controller via API and vRA will then convert this to policies in a similar way it did during the upgrade. This luckily leaves our current project creation intact, but provides no (documented) way of setting the names of the policy for exmaple.
Resource Naming
vRA 8.6.2 had one machine naming definition attached to a project. This would define how machines were named in vCenter for example. The problem with this system was that depending on how big your numbering schema was you could easily end up with duplicate names that vRA tried to assign to vCenter machines. Once it tried to create this resource on vCenter it would then fail.
VMware has now changed this to a policy based system also were you could define custom naming schemas for specific resources either on an organization or on project level. Unfortunatly the counter numbers do not return to zero once the counter would reach its limit according to the pattern. This will then leave you with a “counter exhausted” error.
Be aware that converting to this new resource naming is a one way process. Once converted you can not go back. Since resource naming can be a problem for itself I won’t go into further detail here and will probably safe that for a separate post.
IP assignment
Right at the beginning of vRA 8.8 release notes there is the following section:
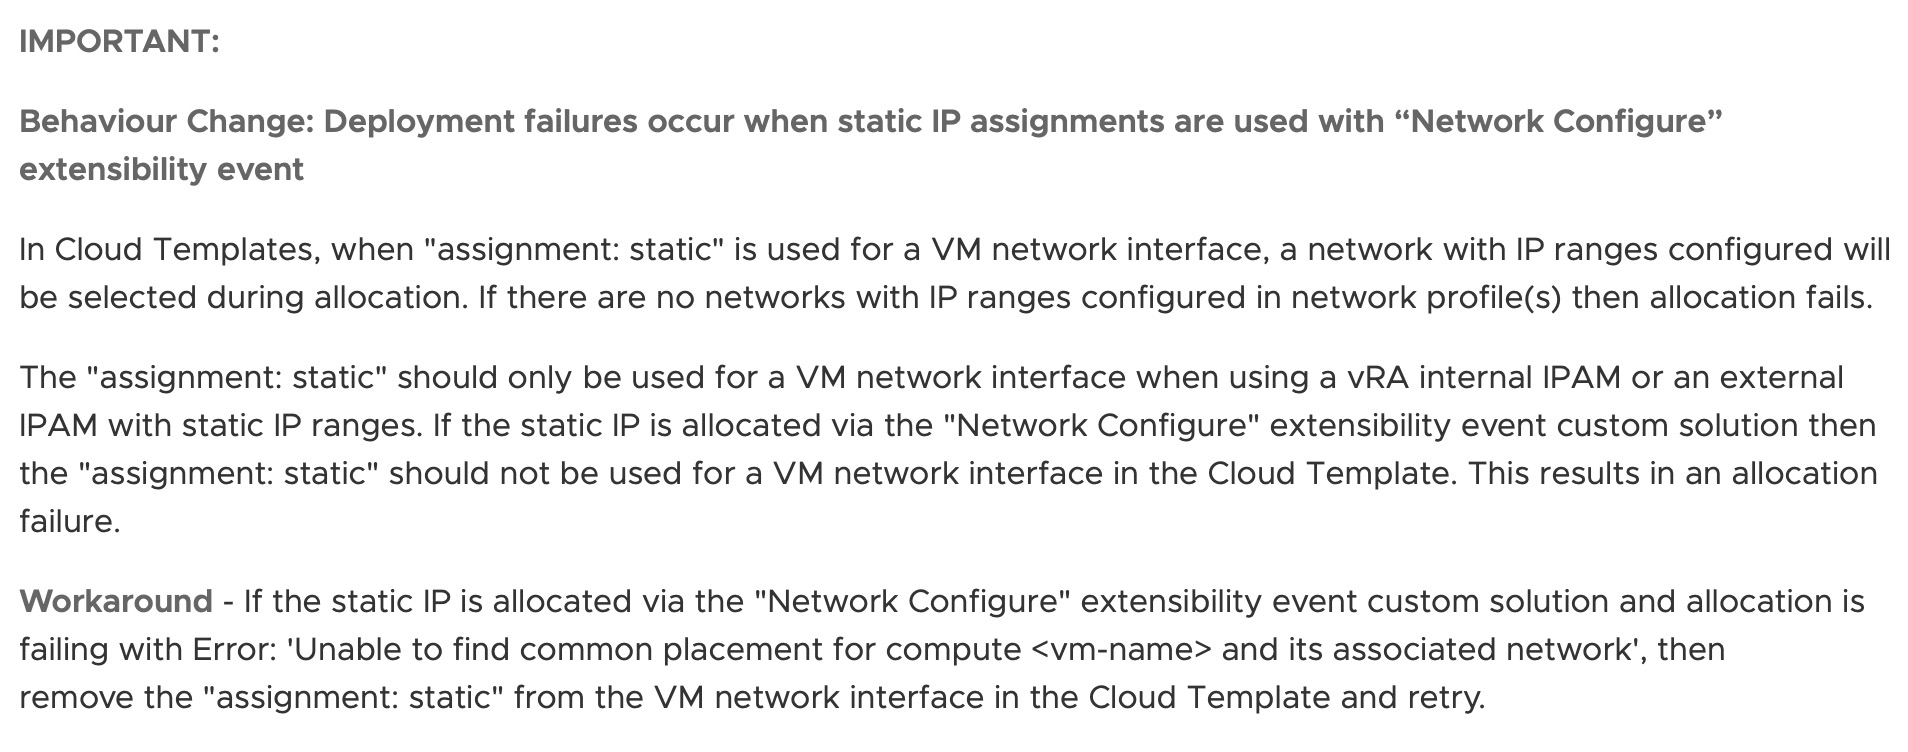
As I usually visit the release notes of all new versions I remembered this once our deployments started to fail while testing vRA 8.10.1.
As this would also be a seperate topic on its own I can only summarize this briefly:
As we use a way of already defining IP addresses while the form is being requested we did actually use “assignment: static” value to feed these addresses in the costumization spec vRA creates for vCenter machines. As “assigment: static” now only is usable for IP addresses that have been assigned from an IP range provided from either vRA’s internal IPAM or a custom IPAM plugin integration we could not use this anymore with vRA 8.10.1.
This led to rewriting all of our cloud templates to use cloud init only with “assignment: dynamic” before we could upgrade.
I mention this here to put emphasis on proper testing before you make the jump. Sometimes you might need to adjust some things first beforehand.
Conclusion
In this article we went over preparing and executing a vRealize Automation 8.6.2 to 8.10.1 upgrade. We also briefly touched a few topics that were important in our case before we went live with this upgrade.
I hope you enjoyed this post. Feel free to share this with the social icons below if you think this could be interesting for your contacts.